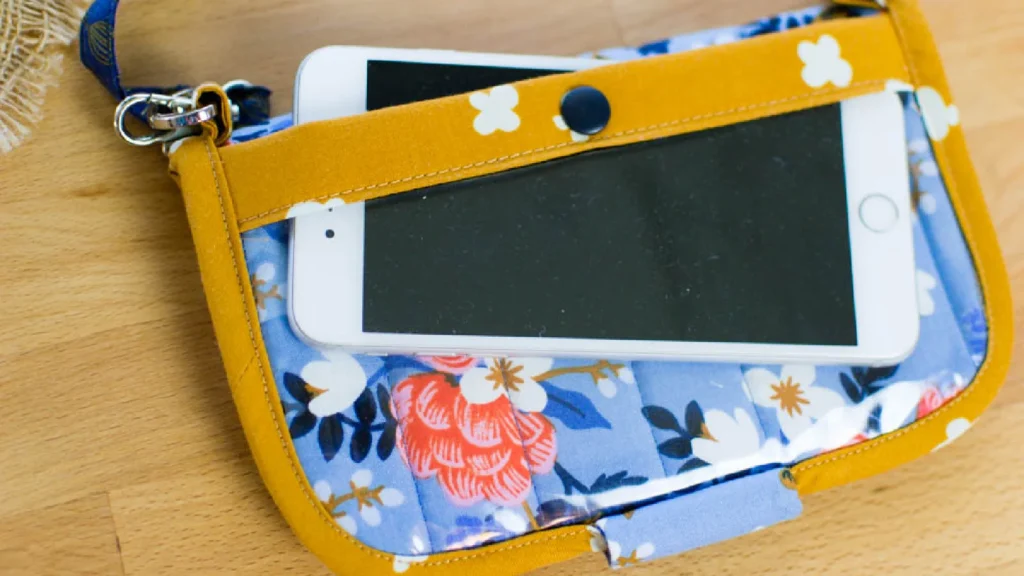
Creating a handmade wallet is one of those satisfying projects that combines functionality with personal style. Whether you’re crafting a sleek bi-fold for yourself or a colorful clutch as a gift, the devil is truly in the details. While following a pattern will get you started, these insider tips will help you elevate your wallet from homemade to professionally crafted.
Choosing Your Materials Wisely
The foundation of any great wallet starts with fabric selection. Canvas, denim, and duck cloth offer durability for everyday use, while faux leather provides a sophisticated finish that’s easier to work with than genuine leather. For a more luxurious feel, consider wool felt or heavy cotton twill.
Pro tip: Always pre-wash your fabric, even for small projects like wallets. Shrinkage after construction can cause seams to pucker and interfacing to bubble.
When selecting interfacing, heavyweight fusible interfacing is your best friend. It provides structure while remaining sewable, unlike some ultra-stiff alternatives that can break needles. For areas that need extra reinforcement, like card slots, consider using a double layer.
The Magic of Precise Cutting
Accuracy in cutting makes the difference between a wallet that looks handmade in the best way versus one that screams “beginner project.” Use a rotary cutter and ruler whenever possible, especially for straight lines. For curves, invest in a good pair of fabric scissors and take your time.
Mark your fold lines and placement points clearly with removable markers. These guides will be invaluable during assembly, particularly when aligning multiple card slots or positioning hardware.
Seam Allowances and Pressing Matter
Most wallet patterns call for ¼-inch seam allowances, but consistency is more important than the exact measurement. Use your machine’s seam guides or mark your throat plate to maintain uniform seams throughout.
Pressing each seam as you go might seem tedious, but it’s non-negotiable for crisp, professional results. Use a pressing cloth when working with synthetic fabrics or interfacing to prevent shine and melting.
Card Slot Perfection
Card slots are often the trickiest part of wallet construction, but a few techniques will ensure smooth sailing. When sewing multiple slots in sequence, use a fabric marker to draw guidelines on your base fabric. This helps keep each slot level and properly spaced.
Start stitching card slots from the bottom and work your way up. This prevents fabric shifting and ensures each slot sits properly. Backstitch at the beginning and end of each slot, but avoid over-stitching, which can create bulk.
Insider secret: Test your card slot width with an actual credit card before cutting all your pieces. Add just enough ease so cards slide in smoothly without being loose.
Hardware Installation Without Tears
Whether you’re adding snaps, magnetic closures, or zippers, proper hardware installation can make or break your wallet’s professional appearance.
For magnetic snaps, reinforce the attachment points with small pieces of interfacing or fabric scraps. This prevents the fabric from tearing over time. Mark the placement carefully and use the provided template or a ruler to ensure both halves align perfectly.
When installing zippers, baste first. Pin the zipper in place, then hand-baste before machine stitching. This extra step prevents shifting and ensures smooth curves around corners.
Topstitching for a Professional Finish
Even if your pattern doesn’t call for it, consider adding topstitching to edges and seams. Use a slightly heavier thread weight and lengthen your stitch slightly for visibility. Topstitching not only looks professional but also reinforces stress points.
Maintain consistent spacing from edges—¼ inch is standard, but ⅛ inch works well for smaller wallets. Use your presser foot as a guide, or invest in an edge-stitching foot for perfectly parallel lines.
Troubleshooting Common Issues
Bulky seams: Grade your seam allowances by trimming each layer to a different length. The layer closest to the right side should be longest.
Puckered seams: Usually caused by tension issues or stretching during sewing. Ease up on pulling the fabric through the machine and check your thread tension.
Uneven card slots: This often happens when fabric shifts during sewing. Use more pins than you think you need, and consider using a walking foot for thick layers.
The Finishing Touches
Before declaring your wallet complete, trim all loose threads and give seams a final press. Check that all hardware functions smoothly and that card slots are the right size.
Consider adding a fabric protector spray for everyday durability, especially if using light-colored fabrics. Store your finished wallet with cards or cardboard inserts for a few days to help it hold its shape.
Beyond the Basic Pattern
Once you’ve mastered the fundamentals, experiment with design variations. Add contrast stitching, incorporate patchwork elements, or create custom card slot configurations. The beauty of handmade wallets lies in their ability to reflect your personal style and specific needs.
Remember, even experienced sewists occasionally need to rip out seams and start over. Each wallet you create will teach you something new, building skills that extend far beyond this single project. The time invested in perfecting these techniques will pay dividends in every future sewing endeavor, creating pieces that look and function beautifully for years to come.
With these tips in your toolkit, you’re ready to create wallets that rival store-bought alternatives while carrying the irreplaceable satisfaction of handmade craftsmanship.


